Getting Things on the Screen

Alright, first things first: displaying something.
Going back over the assembly I wrote following the Pikuma course, I’m putting in the minimum I need to draw to the screen on the Atari VCS.
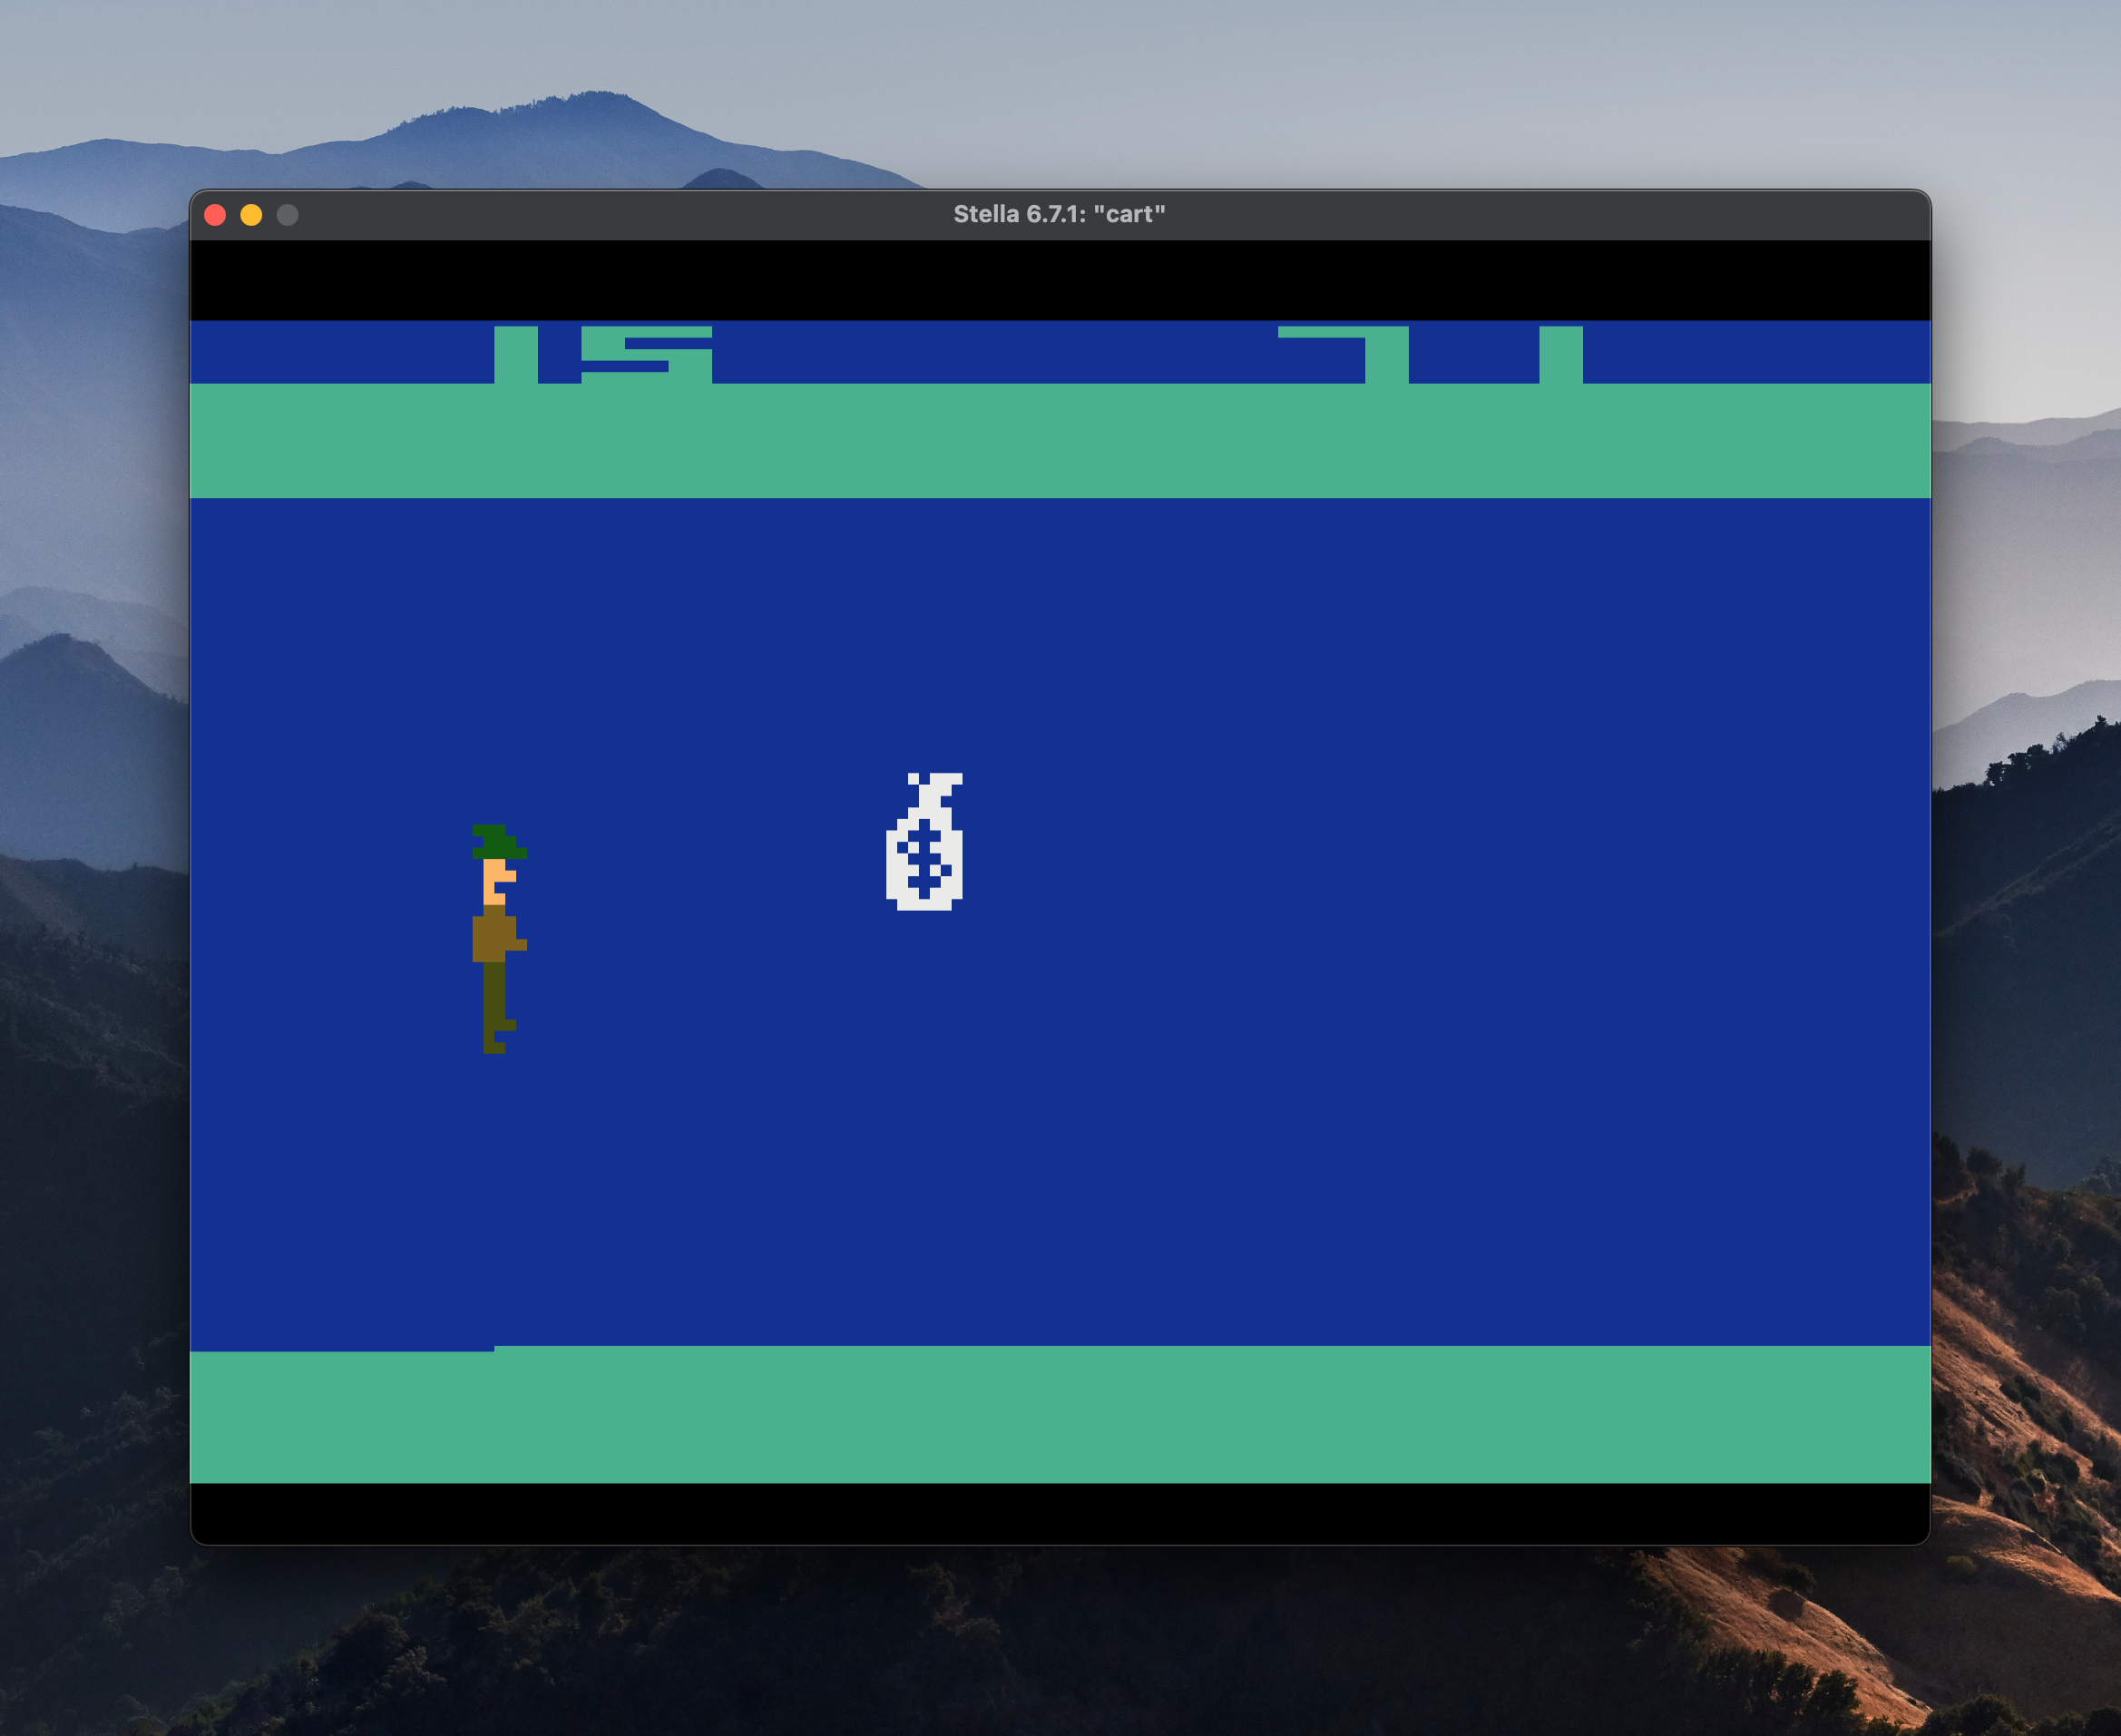
I wanted to start just by drawing some playfield, drawing a P0 and P1 sprite, and a scoreboard. Just to get some basic things on the screen.
This proved to be quite useful, as I enjoy mucking about with things like this. Once I had the code to read joystick input and use that to move the player around, I can start to get a feel for what the system can do. Putting in some graphics, even these quick sketches, lets me start to imagine what the game can do, and what the gameplay could be.
The scores at the top don’t mean anything. I’m just using them for debugging at this stage and sticking different variables to them so I can see what’s happening.
In my picture above, you can see I’ve got my little guy. He’s got a green hat like Robin Hood. Maybe he’s a rougish adventurer off to see the world. The first other sprite I drew was a sack of cash. Not very medieval, but a collectable he could pick up.
I’m thinking this will be a platformer, where each screen has a procedurally generated items or enemies, using a similar method as Pitfall. The 2600 only has one button on each joystick, which rules out jumping and attacking. The button can do one, so I’ll have to choose.
I’m also playing with animating the sprites; while I’m mucking about, it’d be neat if he had a walk cycle when I moved him. Both so I can get the hang of off-setting sprite lookup tables correctly, but also to help sell the game in my mind.
Behold: